도전2022
javafx 2 documentation 본문


Get set up
The first step in getting started with JavaFX is to download and install the Java SE 7 JDK, which includes the JavaFX runtime libraries and utilities. See the JDK 7 and JRE 7 Installation Guide for instructions.
JavaFX Scene Builder provides a simple way to build the UI for your application and connect it to the application logic. To install this tool, see Installing JavaFX Scene Builder.
Create the application framework

Each JavaFX application has a similar framework. The main class for the application extends the Application class. The start() method sets up and shows the stage, which contains the UI for the application. See Hello World, JavaFX Style for information on setting up a NetBeans project and creating a simple application.
Define the UI
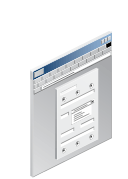
The stage for the application interface contains one or more scenes, which in turn contain the controls, shapes, and images that make up your user interface. See Using JavaFX UI Controls for information on defining controls such as buttons, labels, and text fields for your UI.
The JavaFX Scene Builder's Library panel provides the same UI controls that are available in the SDK. See Library Panel for more information.
Lay out the UI controls

After you decide what controls you want in your UI, use one of the built-in layout panes to manage the size and position of the controls. See Using Built-in Layout Panes for information on setting up your UI controls to create the screens for your UI.
An easier way to lay out your UI is available with the Library panel in JavaFX Scene Builder. You can also manage layouts in JavaFX Scene Builder using the Inspector panel. See Inspector Panel for information.
Deploy

JavaFX applications run on a desktop, in a browser, and by using Web Start. When your application is ready, create the files that your users will run. See Getting Started in Deploying JavaFX Applications for information on packaging and deploying your application.
Manage the layout
Managing the look and feel of your UI starts with the layout. When the default size and position of the controls don't provide the look you want, see Tips for Sizing and Aligning Nodes for ideas on how to adjust the controls and the layout to create your ideal UI.
In JavaFX Scene Builder, you can use the Layout panel to manage the constraints of the nodes. See Layout Panel for information.
Customize UI controls
The appearance and behavior of the UI controls can be modified to better fit the look and feel that you want. Custom controls can also be created. See the Customization of UI Controls for more information.
Custom controls that do not require builders or builder factories can be defined in an FXML file and loaded into JavaFX Scene Builder. See Custom and Unknown Element Types for more information.
Style with CSS
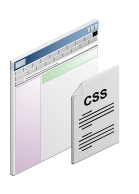
Colors, fonts, backgrounds, borders, and many other characteristics of your UI can be managed with cascading style sheets (CSS). See Fancy Forms with JavaFX CSS for an introduction to using CSS. See Skinning JavaFX Applications with CSS for more information on styling your UI.
JavaFX Scene Builder makes it easy to work with styles for your UI controls. See Skinning with CSS and CSS Analyzer for additional information and Use a Style Sheet for an example.
Apply visual effects

Visual effects such as a drop shadow, blurring, reflection, and lighting can enhance your UI. See Creating Visual Effects in JavaFX for information on applying these and other effects to the controls for your UI.
In JavaFX Scene Builder, the Add Effect command in the Modify menu can be used to easily add effects to your UI elements. See the Modify subcommands table in the Scene Builder User Guide for Menu bar information.
Apply transformations

Objects in your UI can be rotated, scaled, sheared, and shifted to a different location using transformations to create both 2D and 3D effects to highlight different areas of your UI. See Applying Transformations in JavaFX for information.
In JavaFX Scene Builder, the Properties panel can be used to add transformations to your UI elements. See Properties Panel for more information.

Review the architecture
An understanding of the architectural components of the JavaFX platform can help you design your JavaFX application. See JavaFX Architecture and Framework for an overview of the platform, an explanation of how the different components interact, and a description of the features of JavaFX.
Work with scene graph

The Scene Graph API provides the underlying framework that renders your GUI to the screen. This API contains the core classes that you use to build the user interface for your JavaFX application. See Working with the JavaFX Scene Graph for an overview of the Scene Graph API.
Manage threads

Background threads can execute time-consuming tasks and avoid slowing down the responsiveness of your user interface. See Concurrency in JavaFX for examples of working with multiple threads in your JavaFX application.
Handle events

Events are used to notify your JavaFX application of actions taken by the user. Add event handlers and event filters to your application to provide responses to these actions. See Handle JavaFX Events for information about events.
In JavaFX Scene Builder, you can use the Code panel to assign event handlers for different types
of events to your UI controls. See Code Panel for more information.
Use bindings

Binding is a quick way to update an object when a related object is changed. See Using JavaFX Properties and Binding for information on how you can use bindings in your JavaFX application.
Effects, Animation, and Media
Legal Notices Accessibility Statement
'소스코드' 카테고리의 다른 글
| 무료 오픈 소스 ERP 소프트웨어 (0) | 2015.11.06 |
|---|---|
| Killer Game Programming in Java (0) | 2014.07.10 |
| Javafx creating animated texts (0) | 2014.07.09 |
| Netbeans Download : All Package (0) | 2014.07.04 |
| Analog Clock in C# WPF using Rotation(아날로그 시계) (0) | 2014.06.17 |

